
In a previous post, I mentioned giving my first ever talk at a User group 😁, and I promised to dive deeper into what we discussed – well, here it is, let’s go deeper!
– Understanding the Problem
Before jumping into solutions or explaining what a “Hybrid Cloud” is, let’s understand the problem we’re trying to solve. Imagine you’re an “AWSome” AWS consultant, and a client comes to you with this request: “We need to store our large files somewhere and send them to our clients”.
This seemingly simple request actually creates several challenges:
- Storage Issues – These files are typically very large, so companies quickly run out of local storage space and need a better solution for storing them
- Slow File Transfer – Sending large files over the internet to clients is time-consuming, and if there’s any internet disruption, you have to start the whole process over again
- Email Notifications – While not directly related to the storage problem, there’s also the overhead of notifying clients when files are ready, adding another technical requirement to manage
Let me show you how we can tackle all these challenges with a hybrid cloud approach…
– The Solution: Building a Hybrid Architecture
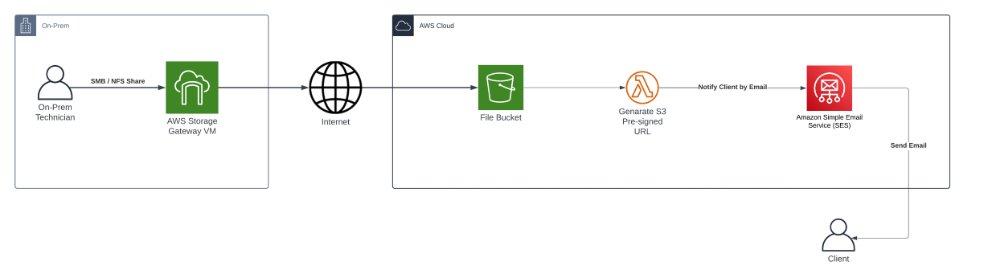
Being the “AWSome” consultant you are, you already know the perfect AWS service for this – AWS Storage Gateway.
With AWS Storage Gateway, we can leverage the power of “Hybrid Cloud” architecture. This means we get the best of both worlds: AWS services handle the heavy lifting of file processing and delivery, while clients continue using their familiar on-premises infrastructure.
But we need more than just storage to create a complete solution. Here’s where AWS’s serverless capabilities come in:
- AWS Lambda handles all the file processing logic
- AWS SES (Simple Email Service) takes care of sending notifications to clients
Let’s look at how these pieces fit together:
Let’s go a bit deeper now on how we deploy this resources!
– The Storage Part: Setting Up AWS Storage Gateway
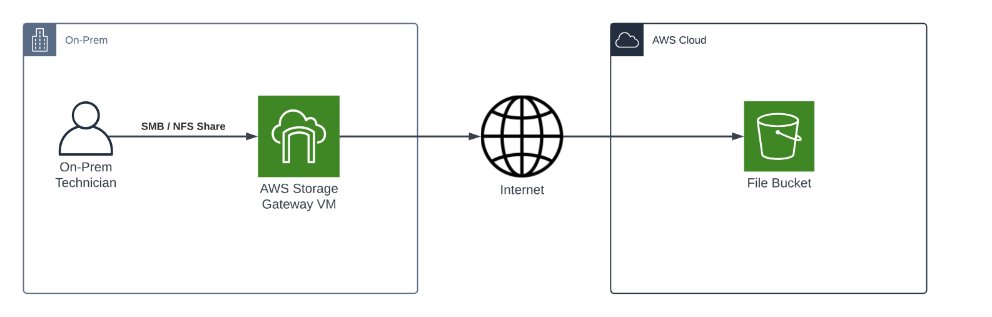
AWS Storage Gateway gives clients access to virtually unlimited storage from their on-premises infrastructure. But how does it work? It’s actually quite clever – AWS provides a virtual machine image that you install on your local network. This VM then connects to an S3 bucket and automatically synchronizes any files uploaded to the file share it creates.
Quick Tip: Storage Gateway isn’t just for S3! It can also connect to other AWS services like EBS. If you’re interested in exploring more hybrid cloud scenarios, definitely check out the other options.
Now let’s get our hands dirty and start building! 🛠️
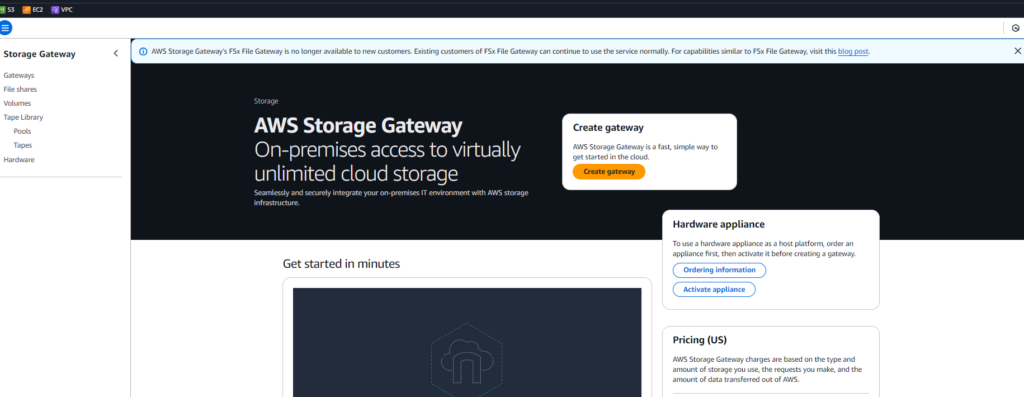
First step: Let’s open the AWS Console and navigate to the Storage Gateway service. I’ll walk you through the setup process step by step.
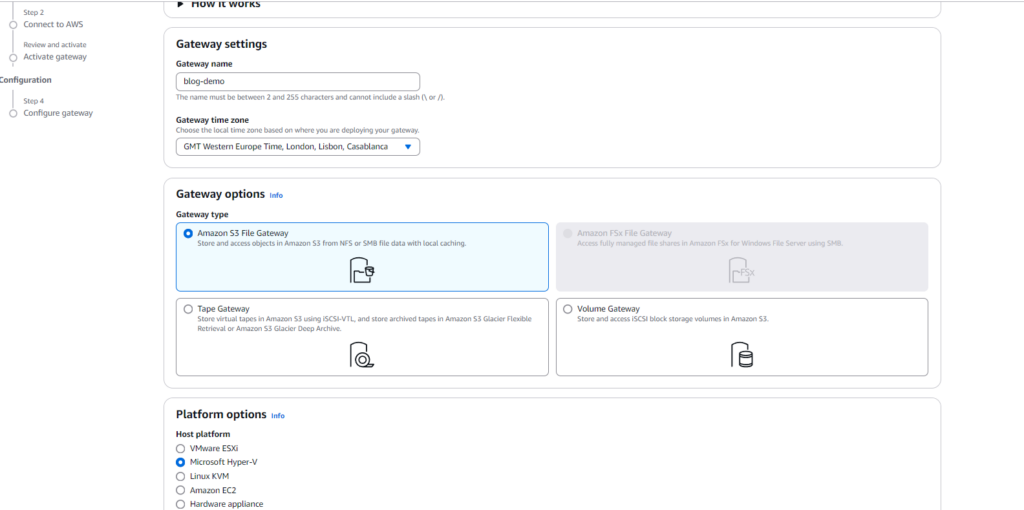
Let’s create our gateway! Here’s what we need to configure:
- Give your gateway a name
- Select your hypervisor – I’m using Microsoft Hyper-V for this demo, but AWS supports several other options like VMware or KVM
- Choose your gateway type – Since we want to store files in an S3 bucket, we’ll select Amazon S3 File Gateway
Pro Tip: The gateway type is important! While there are several types available (like Volume Gateway or Tape Gateway), S3 File Gateway is perfect for file storage and sharing scenarios.
Download the image and let’s move to the next step, and don’t close the setup window:

Import the VM into your preferred Hypervisor and before starting add a second hard disk with a minimum 150 GiB for caching.
Note: If you are using Hyper-V, if the machine is not starting, and it’s stuck on a boot try to change the Virtual Switch that the machine is using to an external network
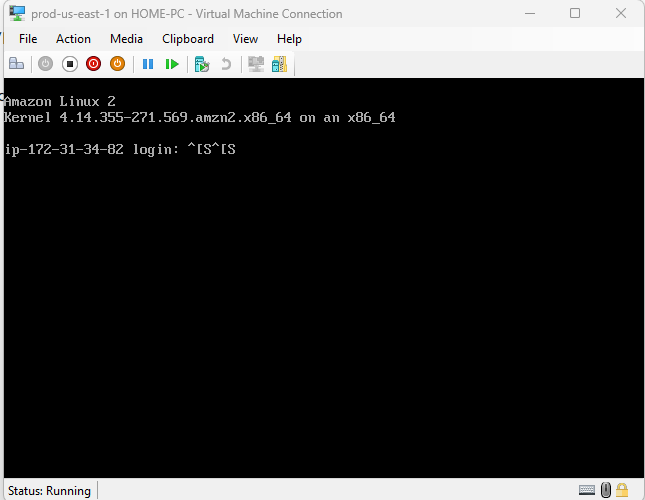
Login with the default credentials admin/password – don’t worry it’s possible to change the password
When you login, it will go to a prompt menu like this:
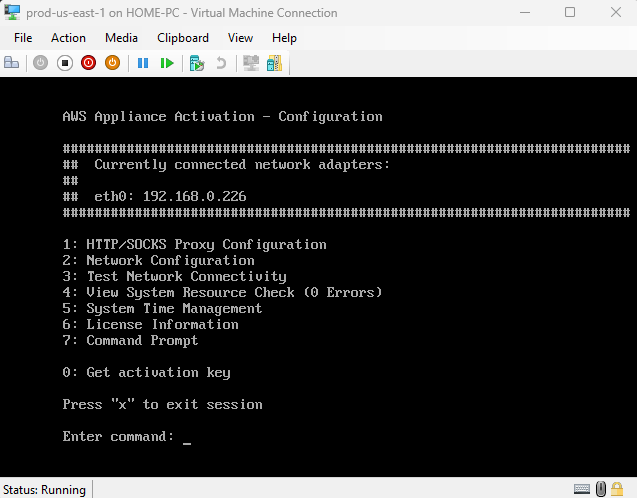
Before we do anything else let’s change the default password, although we can change on the AWS Console after we connect the VM to AWS, let’s change it locally. To do that select the option “7” and write the command “passwd” and write the new password.

With that out of the way, we now have to connect the VM to the AWS console, so that AWS knows what Gateway are we working with and to be able to create file shares.
Let’s move back to the AWS console, back to the setup configuration:
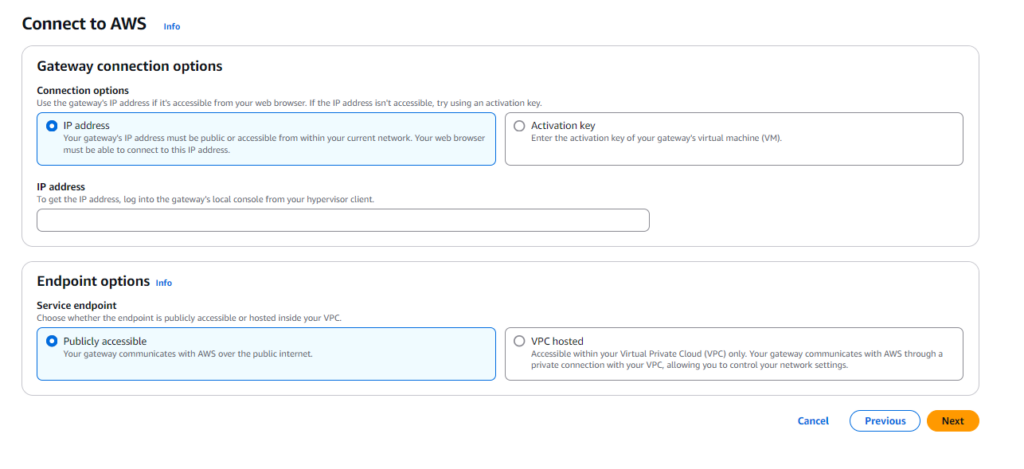
There are two ways to connect your gateway to AWS:
- Using IP Address
- Works when your VM has a public IP address or is accessible from the internet
- Simply provide the IP address to AWS for direct connection
- Using Activation Key
- Requires the VM to have outbound internet access to reach AWS
- You generate a key on the VM and copy it to the AWS console
- This is what we’ll use for our demo!
Let’s connect using the Activation Key method:
- On the VM’s main menu, select option “0”
- Follow the prompts until you get your Activation Key
- Copy this key and paste it into the AWS console
Once you’ve completed all the configuration steps, you should see your Storage Gateway listed as “Configured” in the console.

Congratulations! 🎉 Your Storage Gateway is configured and ready to go. Now we have two more pieces to set up for our hybrid storage solution:
- Create an S3 bucket to store our files
- Configure a file share to connect our gateway to S3
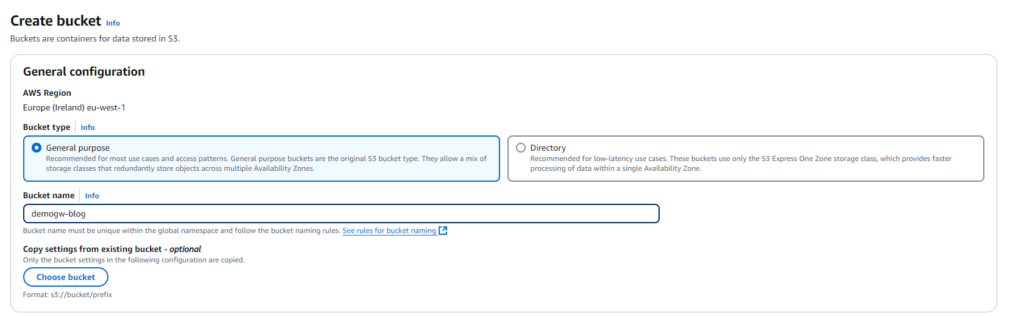
Let’s start by creating our S3 bucket. Head over to the S3 service in your AWS Console, where we’ll create a new bucket to store all the files that need to be sent to clients.

You can leave most of the bucket settings as default, or change it according to your needs. Don’t forget that all buckets across AWS have a unique name, so try to make it unique enough!
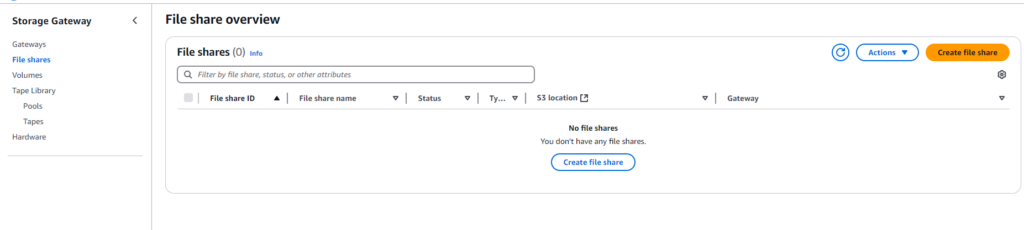
Back to Storage Gateway page, select “File Shares” from the left menu, and let’s create our file share.
Your writing is clear and has a casual tone, which is great for a blog post aimed at explaining technical concepts in an approachable way. Below is a proofread version of your text, with some minor grammatical and stylistic adjustments to make it smoother and easier to follow:
For the file share, there are two network protocols you can choose from: NFS and SMB. The best option depends on the environment where your applications are running. For example, if you’re in a Windows environment, SMB might be the better fit. On the other hand, NFS could be the preferred choice for Linux-based setups.
In my case, I’ll set up an SMB share since I’m working in a Windows environment. That said, the process for setting up NFS is very similar, so don’t worry if you decide to go with that instead—it’s just as straightforward.
When creating the file share, you’ll need to associate the Gateway you previously set up with an S3 bucket. Once that’s done, you can go ahead and create the file share.
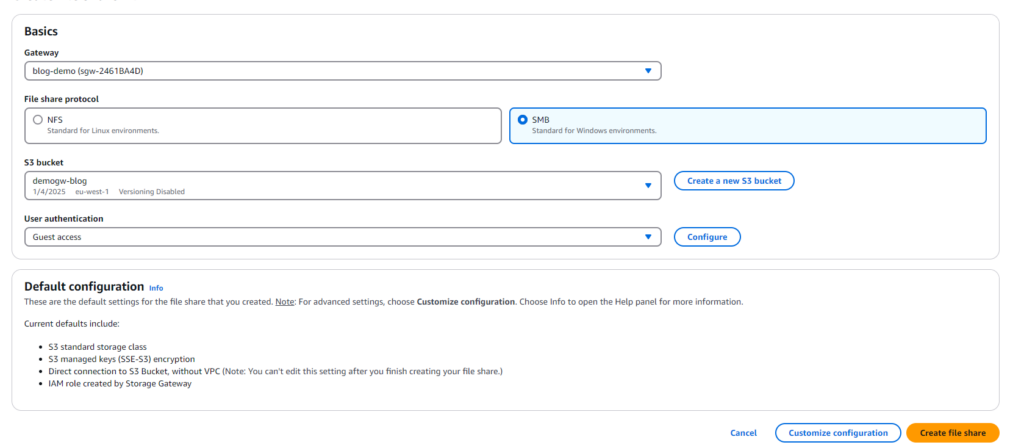
Note: For SMB, you can set up authentication in one of two ways: Guest Access or Active Directory. If you have Active Directory in your environment, it’s a great way to secure access to the share by enabling it only for users with the proper permissions. If Active Directory isn’t available, you can configure a password for Guest Access instead, and you’re good to go!
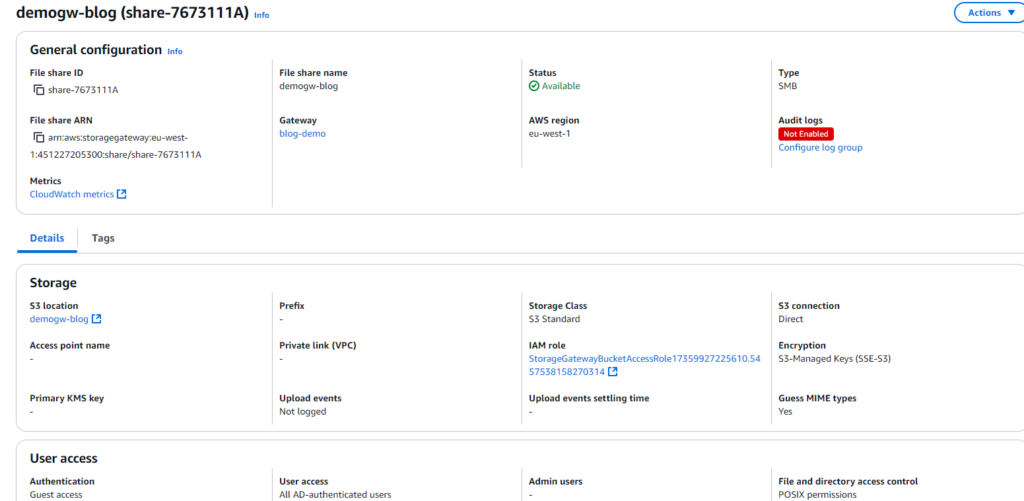
After a minute or two, the file share should show up with the status “Available.”.
Let’s try to connect to it on our local network – note that in the page information AWS provides commands to connect to the file share.


Looks like it’s working! Now, let’s try uploading a file and see if it appears in the connected S3 bucket.
Looks like it’s working! Now we can move on to the next part where we take care of processing the uploaded file and send it over email.
The Sending part – The power of Serverless
With our storage setup, we can now process our files and send them to the corresponding client—and what better service for this than AWS Lambda!
When thinking about how to securely send our files, we stumble upon a small challenge: enabling secure downloads from our S3 bucket.
We could just make our S3 objects public and have our Lambda function share a direct link… but let’s be honest, that’s not very secure.
Luckily, S3 has a feature perfect for this: S3 Pre-Signed URLs!
With a Pre-Signed URL, we can provide clients with a temporary download link that allows them to securely retrieve their files. So, looking at our architecture, we now have two puzzle pieces to fit together:
- AWS Lambda, triggered by S3 whenever a file is uploaded.
- S3 Pre-Signed URLs, generated by the Lambda function to share the files securely.
But wait—we’re missing one piece! How do we send the link to the client?
If you’ve worked with AWS before, you probably know the answer: AWS SES (Simple Email Service). Here’s how our plan comes together:
- When a file is uploaded, it triggers an AWS Lambda function.
- The function determines which file to send and who to send it to.
- A Pre-Signed URL is generated for the file.
- The URL is emailed to the client using AWS SES.

With our plan ready, let’s get back to building!
First, we need to set up our mail system. To do this, we’ll configure an identity in SES to send emails. Head over to the SES section in the AWS Management Console and select “Identities” from the left-hand menu.
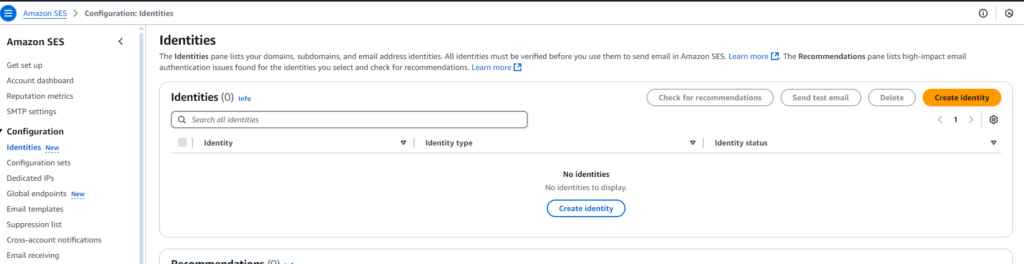
When configuring an Identity, SES gives you two options depending on your current email setup: Domain or Email Address.
- Choosing Domain allows SES to send emails using your custom domain. However, this requires you to configure DNS entries, such as adding TXT and CNAME records to your DNS provider.
- On the other hand, selecting Email Address lets SES send emails on behalf of a specific verified email address.
For simplicity and demo purposes, let’s go with the Email Address option. Enter the email address you want to use and verify it.
Once the verification is complete, you’ll see an Identity created with the email address you provided.

Now that SES is set up to send emails using our verified email, it’s time for my favorite part—configuring our Lambda Function! 🚀
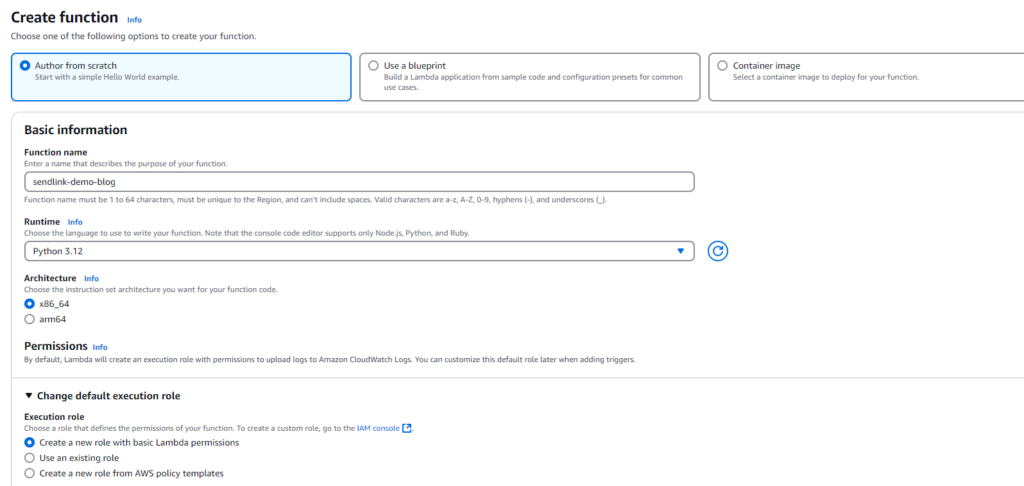
Head over to the AWS Lambda page and create a new function.
For this demo, I’ll be using Python 3.12 as the runtime. Give your function a name that makes sense for the task, and select the option to create a new role for the function.
We’ll need to add some specific policies to this role later to ensure the function has the right permissions.
Before diving into the code, let’s make sure our Lambda function has the right permissions to:
- Access the S3 bucket and its objects.
- Send emails via SES.
To do this, we need to add the appropriate policies to the role attached to our Lambda function.
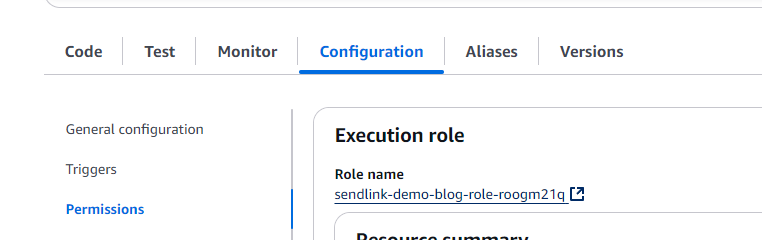
- Navigate to the Role:
- Go to the “Configuration” tab of your Lambda function in the AWS Management Console.
- Select “Permissions” from the side menu.
- You’ll see a link to the IAM role associated with your Lambda function. Click on it to open the IAM page.
Once there, we can attach the necessary policies to grant access to S3 and SES.
Now let’s attach the necessary policies onto the role:

Of course, you could create your own inline permissions to make things more restrictive and tailored to your needs—but let’s keep it simple for now! 😊
With the permissions in place, your Lambda function should now have access to do what it needs: read from the S3 bucket and send emails via SES.
Now, we’re ready for the fun part—adding the code:
import logging
import os
import boto3
import re
import time
from botocore.exceptions import ClientError

LOGGER = logging.getLogger(__name__)
LOGGER.setLevel(logging.INFO)

logging.basicConfig(level=logging.INFO, format='%(asctime)s - %(levelname)s - %(message)s')
logging.basicConfig(level=logging.ERROR, format='%(asctime)s - %(levelname)s - %(message)s')

SESclient = boto3.client('ses')
s3_client = boto3.client('s3')
s3 = boto3.resource('s3')

def lambda_handler(event, context):
    bucket_name = (event['Records'][0]['s3']['bucket']['name'])
    object_name = event['Records'][0]['s3']['object']['key']
    bucket = s3.Bucket(bucket_name)

    LOGGER.info('Object name %s from bucket %s', object_name, bucket_name)

    ## GET data from TXT file
    data = s3_client.get_object(Bucket=bucket_name, Key=object_name)
    contents = data['Body'].read()
    content_s = str(contents.decode())

    client_email = file_checker(content_s, "client")

    if is_valid_email(client_email):
        LOGGER.info("Mail ok")
    else:
        LOGGER.error("Check Email!")

    file_name = file_checker(content_s, "file")

    fields = [client_email, file_name]

    for field in fields:
        if field is None:
            return

    LOGGER.info('Key to be sent: %s', file_name)

    ##Wait until file appears
    while is_file_present(bucket, file_name) is False:
        LOGGER.info('Object not available...waiting')
        time.sleep(10)
    LOGGER.info('Object found!')

    LOGGER.info('Sending email')
    url = create_presigned_url(bucket_name,file_name)
    response = SESclient.send_email(
        Destination={
            'ToAddresses': [client_email],
            },
            Message={
                'Body': {
                    'Html': {
                        'Charset': 'UTF-8',
                        'Data': 'Download your file: <a class="ulink" href="'+url+'" target="_blank">HERE</a>.',
                        },
                        },
                        'Subject': {
                            'Charset': 'UTF-8',
                            'Data': 'Important: New File uploaded',
                            },
                            },
                            Source='[email protected]',
                            )

##Check if file exists
def is_file_present(bucket, key):
    key_found=False
    for obj in bucket.objects.all():
        if obj.key == key:
            key_found = True
    return key_found

def create_presigned_url(bucket_name, object_name, expiration=3600):
    try:
        response = s3_client.generate_presigned_url('get_object',
                                                    Params={'Bucket': bucket_name,
                                                            'Key': object_name},
                                                    ExpiresIn=expiration)
    except ClientError as e:
        logging.error(e)
        return None

    # The response contains the presigned URL
    return response

def is_valid_email(email):
    pattern = r'^[\w\.-]+@[\w\.-]+\.\w+$'
    return re.match(pattern, email) is not None

def file_checker(content, field):
    try:
        search = re.search(f'(?<={field}:).*', content).group()
    except:
        LOGGER.error('Error in the %s parameter. Please review text file.',field)
        return
    else:
        return search.strip()
If you look at the code, you’ll notice that for the Lambda function to work and know what to send and where, it looks at a text file that is uploaded alongside the object. This text file contains both the name of the object and the email address to send it to.
Now, of course, there are other (and possibly better) ways to handle this. For instance, you could have a front-end application that lets you select a file and input an email address. If you have ideas or suggestions, feel free to drop me a comment or email—we could collaborate and improve this together! 😊
But for now, let’s stick with the current setup.
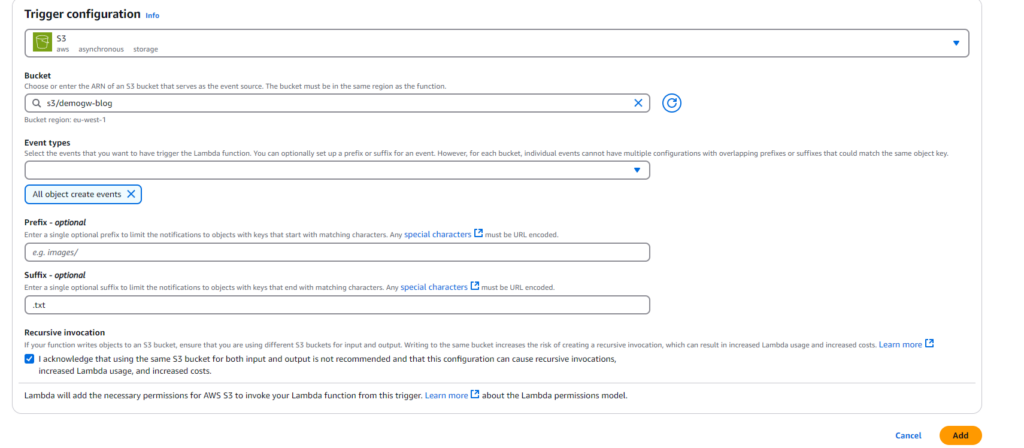
Now that our Lambda function is ready, there’s one last thing to set up: the trigger. This ensures that the function runs whenever a new object is uploaded to the bucket.
To do this:
From the list of services, choose S3 as the source.
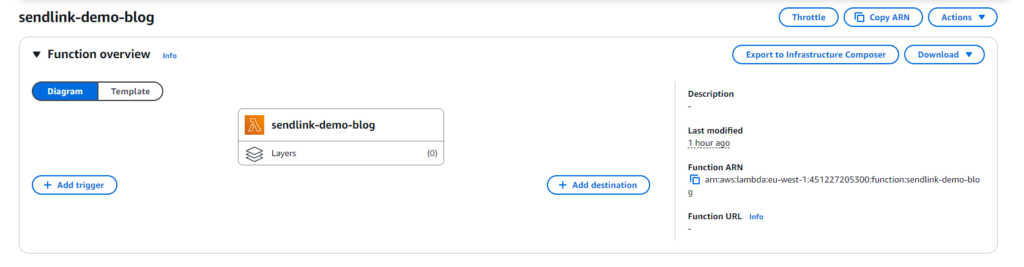
Navigate back to the main page of your Lambda function.
Select “Add trigger” at the top.
Select the bucket where files are being uploaded, the same that it’s connected to the file share. Here we can also configure “prefix”, what folder the trigger should be coming from and “suffix” what kind of extension does the object have, In this case let’s have the suffix as “.txt” so that it’s trigger when the text file with the information is uploaded.
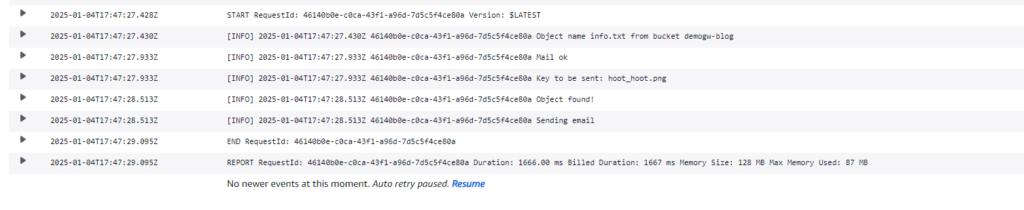
Now we should be ready to test!
Looks good! Let’s confirm on Cloudwatch:
Congrats we now have a fully functional application with Serverless and AWS Storage Gateway! 🥳
Do you have any questions or suggestions? Write a comment down below or email me!
Don’t forget to share! 😄

-Updates and disclaimer –
- This is a proof of concept to show how you can leverage Hybrid Storage with AWS and Serverless, do not use in production. Of course I’m open to suggestions!
- Pre-signed URL has a max time limit of 12 hours, which could create issues if the user doesn’t open the link within that time limit. A way to work around this is to have 2 lambdas, one that will send a lambda URL and other that will create the Pre-signed URL only when it’s called by the user (lambda URL), like this the pre-signed URL is only created at the time the user clicks the link. I can approach this in a later post!
- Added videos for demos.