– It’s pretty simple actually
As you can imagine, I just started blogging, and while I was setting it up, I thought to myself – ‘this could be a blog post,’ so here we are! Maybe this could inspire someone out there who has been thinking of starting one or is unsure if they should start one, so here’s a little help.
First, I had to think of two important aspects:
- The name of the blog, domain, and where I should get the domain.
- How the webserver should be provided – locally? On the cloud? If so, which cloud provider should I use?”
– The domain part
Before any technical setup, it’s important to define the name you’ll use for the blog – the name users will input when searching for it. To achieve this, you need to own a domain, a unique address like vidicorner.com.
A domain can be purchased from various websites such as “domain.com” or Cloudflare. Alternatively, you could use AWS Route 53, which is AWS’s DNS service, to set up the domain. Each option comes with different advantages and price points, so please assess what works best for you. Don’t worry; it’s not a permanent decision, and you can always move to another domain provider. In my case, I started with Cloudflare.
– Domain bought, what now?
Congrats! Now you too own your own little corner of the internet 😁. There’s still some DNS configuration to be done, but that can only be completed after setting up our webserver, where the blog will be hosted. This brings us to the question of how to host the webserver. While hosting it locally has its advantages, it can pose problems down the line, such as security or hardware issues. Therefore, I decided to go with a Cloud provider, as it takes care of hardware provisioning and web hosting. There are many cloud providers to choose from, like Google Cloud, Microsoft Azure, and AWS. In this case, we will be using AWS to deploy the webserver with the AWS EC2 service.
– The setup part
Now that we’ve decided where the webserver will be hosted, let’s start deploying something. There are various ways to deploy a webserver, and even more options for a blog (instead of using WordPress, you could opt for Ghost). For instance, if you have little experience with AWS or the IT side in general, you might consider AWS Lightsail. It allows you to create a webserver or application quickly and easily, although it manages some aspects you may want to handle yourself – you can use this guide for reference.
However, since we are using EC2, let’s begin by navigating to the AWS Console and selecting a region for deploying our webserver. In my case, I chose Ireland (eu-west-1) as it’s the closest to me. However, it’s a bit indifferent for now since we aren’t expecting much traffic.
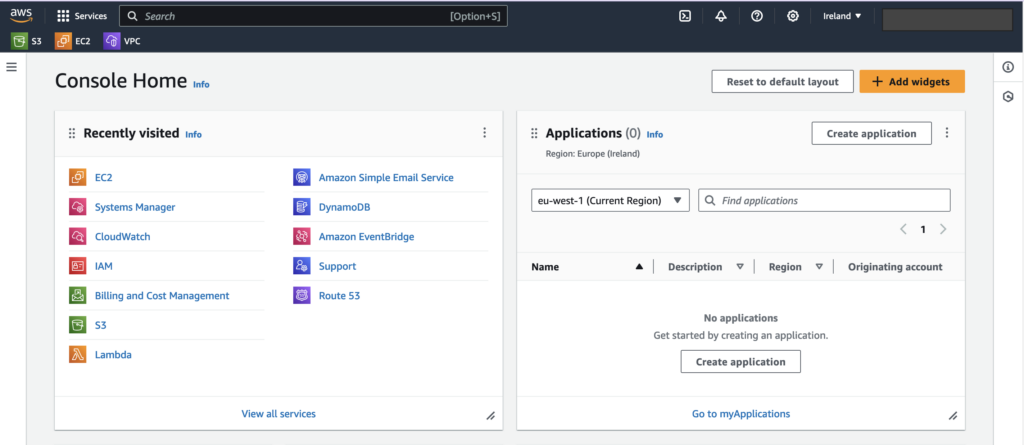
Search for ‘EC2’ and on your ‘Instances’ page, you should have a ‘Launch instances’ option. Select it, and it will take you to a page to insert the parameters for the instance. You can leave most as the default, but I recommend the following options:
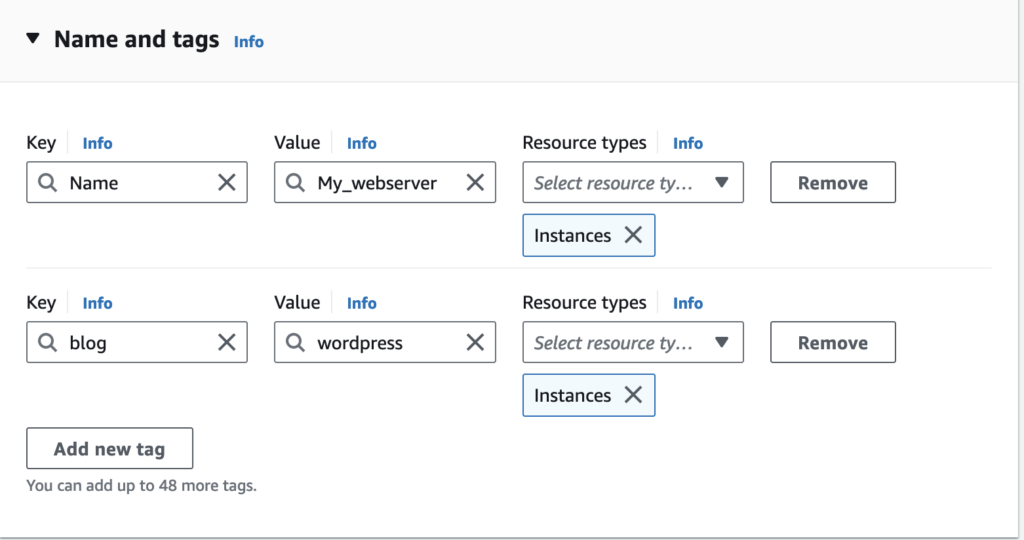
- Name and Tags – Instead of giving a direct name to the instance, we add a tag with a key value for the desired name. You can also add additional tags. For example:
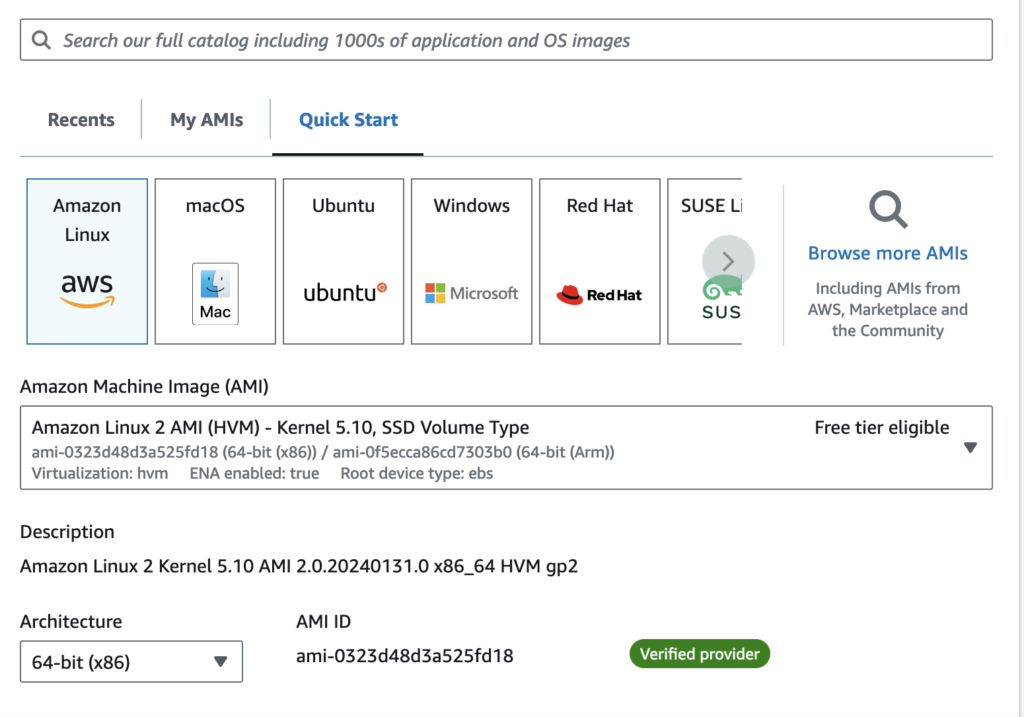
- AMI (Amazon Machine Image) – This is the operating system that we are going to use for the webserver. In this case, we chose the Amazon Linux 2 AMI, which is eligible for the free tier.
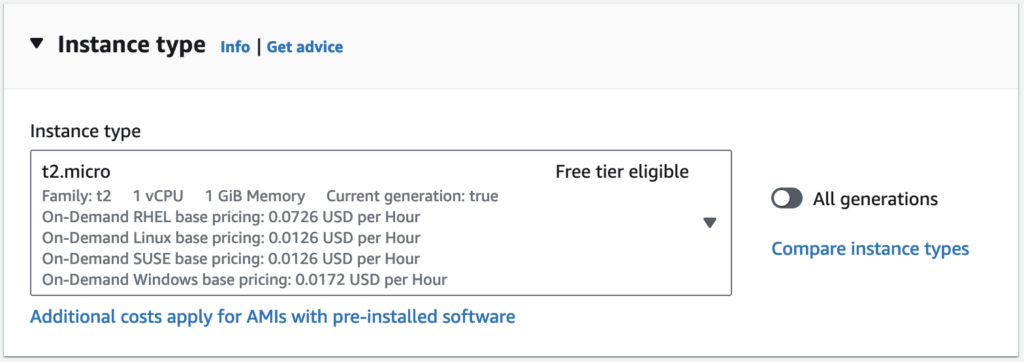
- Instance Type – Here, we define how much CPU and RAM the instance should have. For now, the default t2.micro (also free tier eligible) should work just fine. If it feels too slow, you can always change it later.
- Key Pair – Since we will be using SSH to access the instance, we need to create a key pair. Create it and keep the downloaded key safe. Another secure option would be using AWS Systems Manager Session Manager, which enables us to log into the machine directly from the AWS console. You can read more about it here.
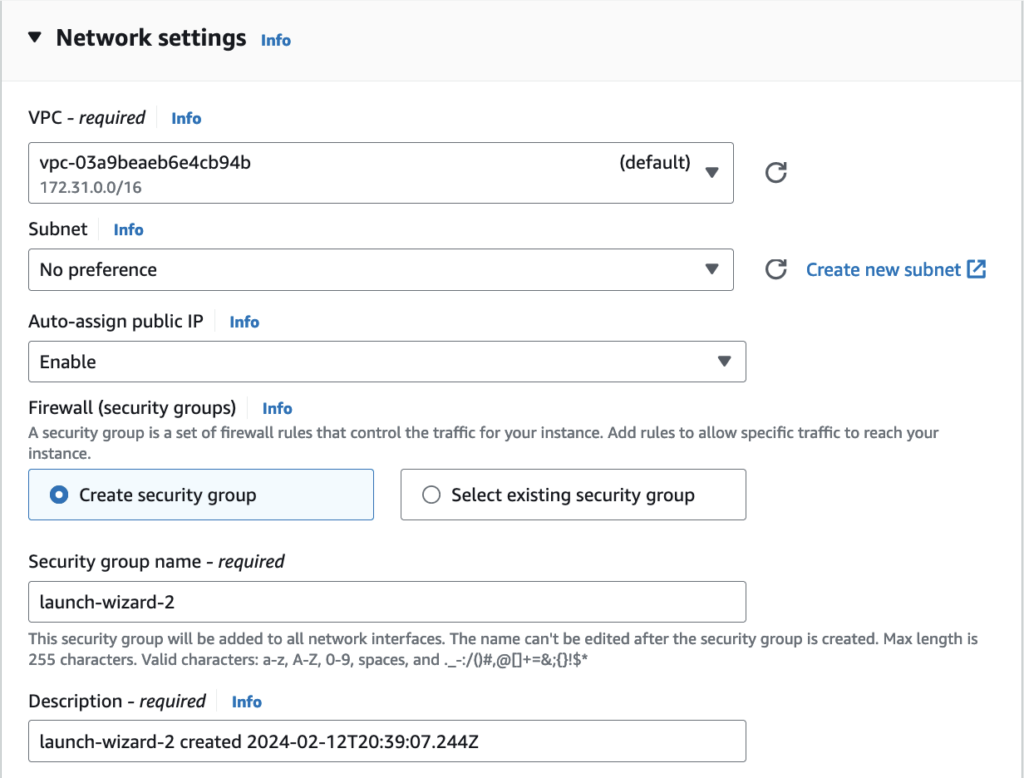
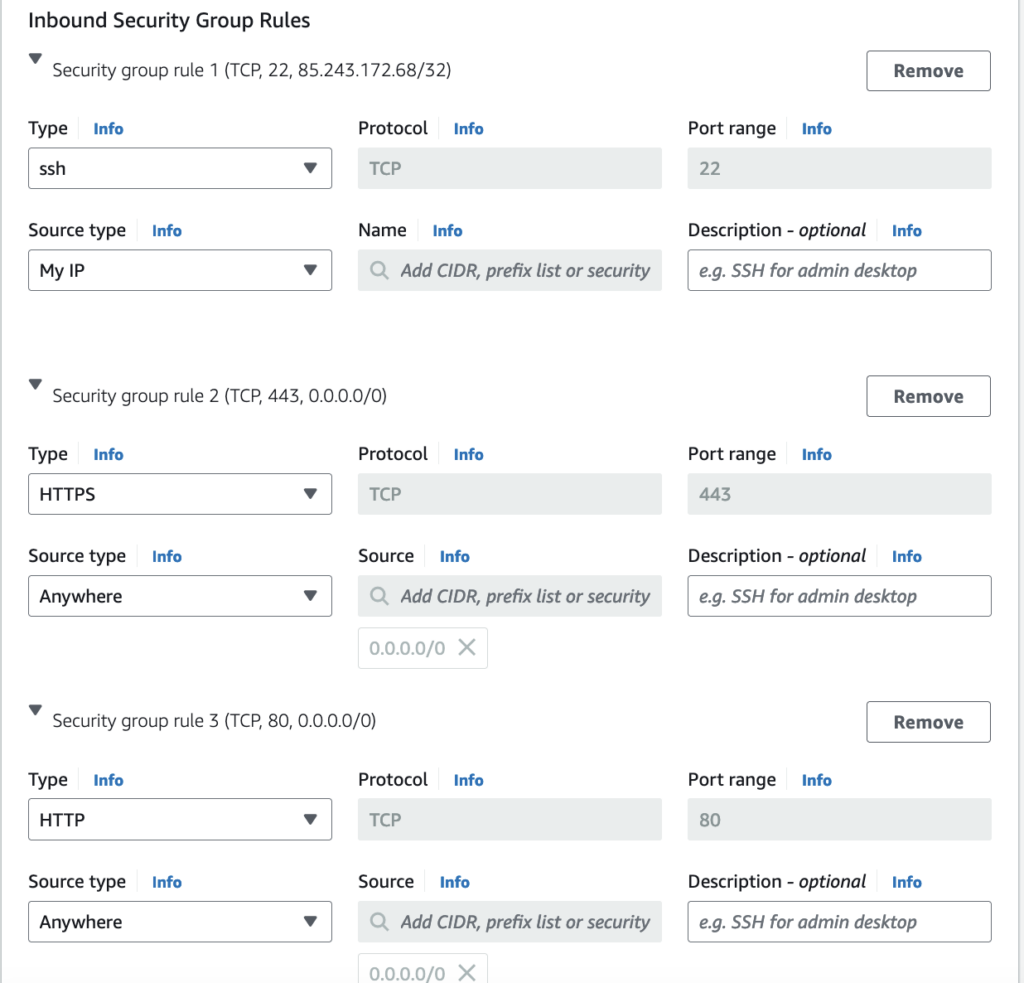
- Network Settings – No need for changes here for now, but for testing reasons, we can check the HTTP and HTTPS options and add your personal public IP for the SSH source so we can connect to it. Also, make sure the ‘Auto-assign public IP’ is set to ‘Enable’.
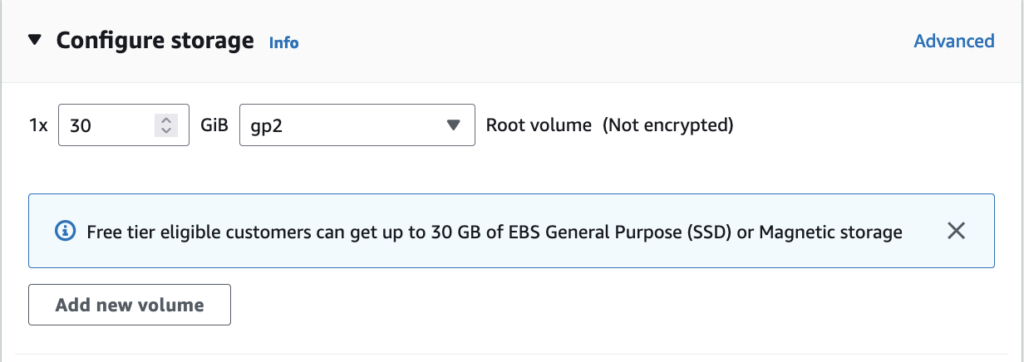
- Storage – I recommend at least 30gb gb2for the root volume. You could add another disks if you feel like you’ll need it.
No other settings are required, so simply click the ‘Launch Instance’ button, and our server should be running in a few seconds.

Before anything else, we need to allocate a new public Elastic IP because if, for some reason, the instance is shut down, the current IP will change, potentially causing redirect issues. So, still in the EC2 console, select ‘Elastic IPs’ and choose ‘Allocate Elastic IP address.’ In the next screen, leave it as is, and it should display the allocated IP. The next step is to associate the IP address with the instance we created:

Next let’s see if we can ssh to our instance and start installing our webserver.
Run the following commands the command line(linux):
$ chmod 400 key_test.pem
$ ssh -i "key_test.pem" ec2-user@ec2-[public-ip].eu-west-1.compute.amazonaws.com
We in!

Perform the necessary updates with the “yum update” command and let’s proceed to the next step.
– Database and Webserver
With our instance ready, we can now start configuring the database that WordPress will be using. While this can be achieved with AWS RDS, for simplicity reasons, we will install the database on the same server as the webserver.
Start by installing MariaDB:
$ sudo amazon-linux-extras install mariadb10.5
Then PHP and WordPress dependencies:
$ sudo amazon-linux-extras install php8.2
$ sudo amazon-linux-extras enable php8.2
$ sudo yum install php-cli php-xml php-json php-mbstring php-process php-common php-fpm php-zip php-mysqlnd php-gd git -y
Lastly we can now install Apache httpd (webserver service):
$ sudo yum install -y httpd
After the service is installed start it and enable it so it always start on reboot.
$ sudo systemctl start httpd
$ sudo systemctl enable httpd
If everything went fine and the Security Groups are properly configured you should be able to test the webserver by inserting the public ip in the browser and connecting via http.

To be able to modify and add files to the httpd folder with the default “ec2-user”, we need to add said user the the apache group, so let’s do that:
$ sudo usermod -a -G apache ec2-user
Exit the ssh connection and log in again to refresh the console and perform the following:
$ sudo chown -R ec2-user:apache /var/www
$ sudo chmod 2775 /var/www && find /var/www -type d -exec sudo chmod 2775 {} \;
$ find /var/www -type f -exec sudo chmod 0664 {} \;
This will give the correct read/write permissions for the “ec2-user” so we can perform our configurations in the webserver without issues.
Optionally we can now test PHP too by creating the php info file:
$ echo "<?php phpinfo(); ?>" > /var/www/html/phpinfo.php
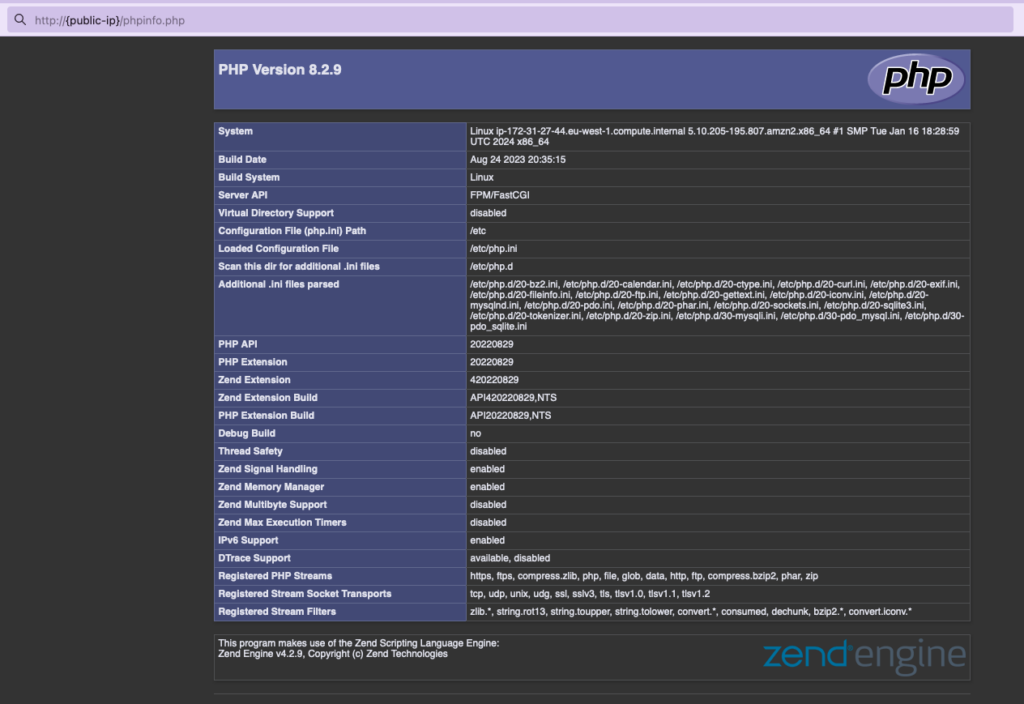
Now let’s proceed with the database configuration
First let’s start the database service:
$ sudo systemctl start mariadb
$ sudo systemctl enable mariadb
Configure the DB password with the following command, the other options choose “Y”:
$ sudo mysql_secure_installation
Login into the DB:
$ mysql -u root -p
Now we can create a DB user and a DB for wordpress:
CREATE USER 'wordpress-user'@'localhost' IDENTIFIED BY 'your_strong_password';
CREATE DATABASE `wordpress-db`;
Save these values, as we will need them later for wordpress. Let’s give the DB user we created permissions:
GRANT ALL PRIVILEGES ON `wordpress-db`.* TO "wordpress-user"@"localhost";
FLUSH PRIVILEGES;
exit
Database is now ready to be used by wordpress!
– WordPress installation and configuration
Start by downloading wordpress and extract it:
$ wget http://wordpress.org/latest.tar.gz
$ tar -xvf latest.tar.gz
Now that we extracted it, we have the wordpress configuration files. Create a copy from the sample configuration file and edit it with your favorite text editor.
$ cp wordpress/wp-config-sample.php wordpress/wp-config.php
$ vim wordpress/wp-config.php
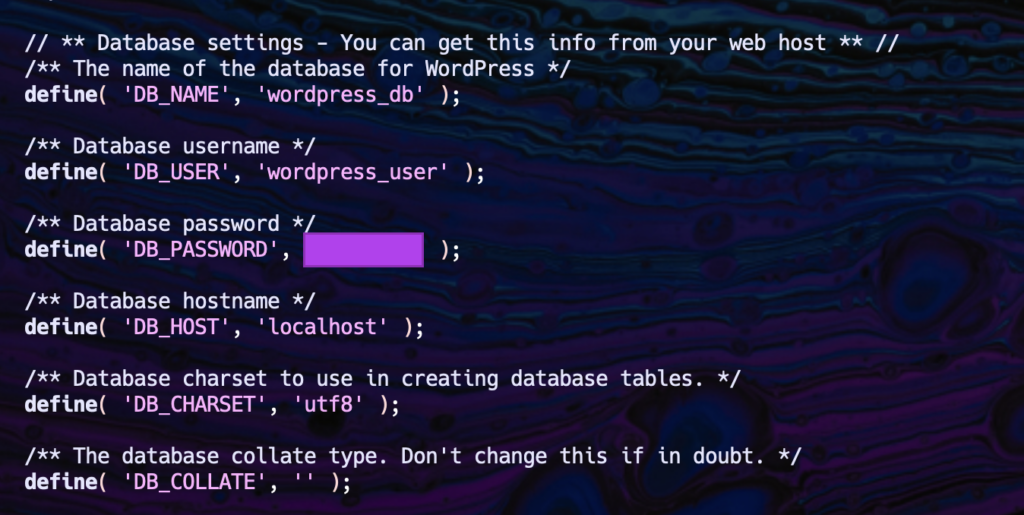
Change the database name, user and password with the values that was configured in the previous step.
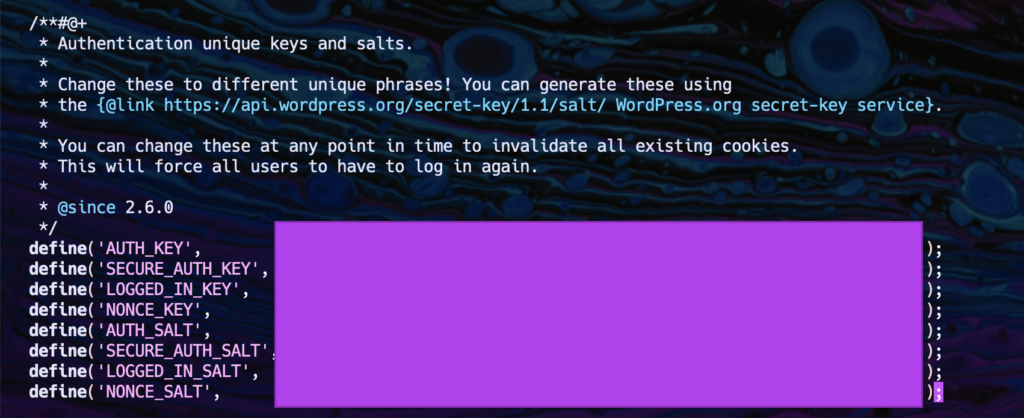
Find the “Authentication unique keys and salt” section below th DB configurations and copy and replace with the values give in this link. This will add a layer of encryption when wordpress saves cookies.
Save and close the file and let’s install wordpress into the webserver by copying it’s contents:
$ cp -r wordpress/* /var/www/html/
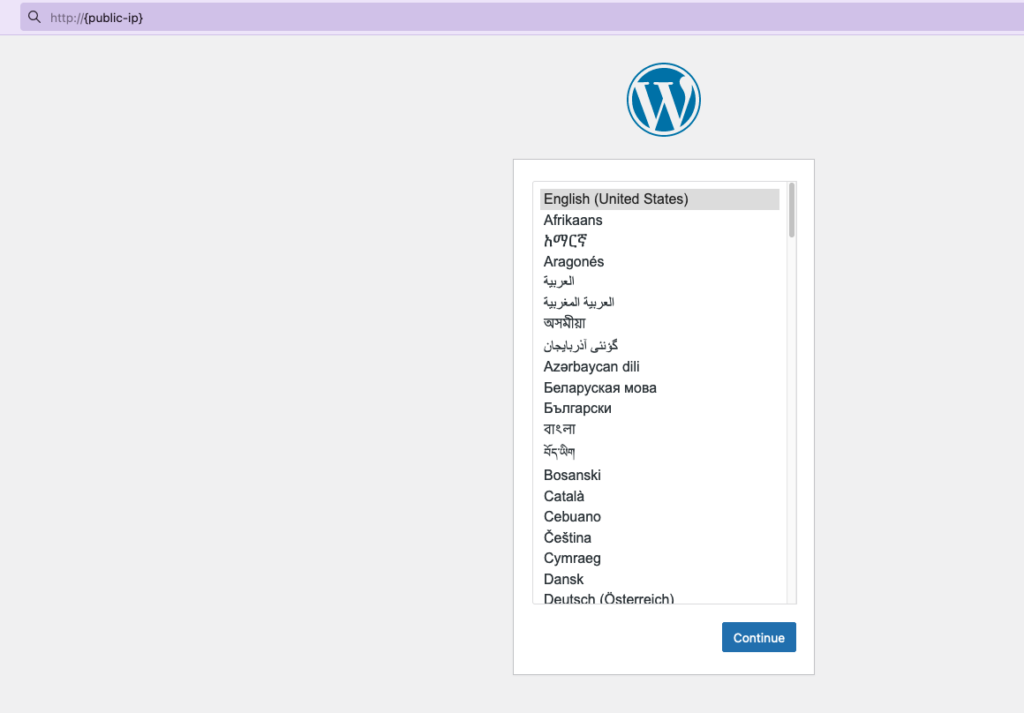
Restart the webserver and wordpress is installed!
$ sudo systemctl restart httpd
– Next steps
Congrats! You now have your own WordPress blog hosted on AWS!
But there are still some details that need to be taken care of, like DNS and SSL/TLS. For now, to access the blog, you need to insert the public IP provided by AWS, but it’s not very memorable, is it? To fix this, you need to configure the DNS routing where the domain was bought. After this, you should be able to access the blog by the name you bought, such as ‘vidicorner.com.’
Another detail is SSL/TLS – notice how when we enter the blog, the connection shows as insecure? This can be easily fixed by following this guide provided by AWS.
With these out of the way, customize the blog as you like with the many themes and plugins, and you should be completely ready to start blogging – have fun out there! 😃
Leave your opinion in the comments, and if you encounter any issues, don’t hesitate to reach out.

